Cladding Installation Explained: The Step-by-Step Process Ontario Property Owners Should Expect
Choosing the right cladding material is only half the equation. The other half — and arguably the more important one — is how that material gets installed. A premium ACM panel or fiber cement board installed poorly will fail years before its rated lifespan, while a mid-range material installed correctly can outperform expectations for decades.
If you’ve already researched the most popular materials in Canada, including aluminium composite panels, metal panels, fiber cement, and glass curtain wall systems in our guide to commercial cladding services, this article picks up where that one left off: what actually happens once the contractor shows up on site.
Why Installation Quality Matters More Than the Material
Most cladding failures aren’t material failures — they’re installation failures. Gaps in flashing, missing moisture barriers, and improperly fastened panels let water behind the cladding, where it causes rot, mold, and structural damage long before anyone notices a problem on the surface.
This is why building owners should spend as much time vetting a contractor’s installation process as they do comparing material samples. A well-installed mid-tier product will consistently outlast a premium product that’s been rushed or poorly sealed.
The Cladding Installation Process, Step by Step
A professional cladding job generally follows the same sequence, regardless of whether it’s a single-family home or a multi-story commercial building:
- Site assessment and consultation — the installer evaluates the existing wall structure, checks for moisture damage, and confirms the design plan.
- Material preparation — panels are pre-cut and prepared off-site or in a fabrication shop to match exact measurements.
- Substructure installation — a metal rail or z-girt system is mounted to the wall to create the mounting surface for the cladding.
- Moisture barrier and weatherproofing — a building wrap or membrane is applied before any panels go up.
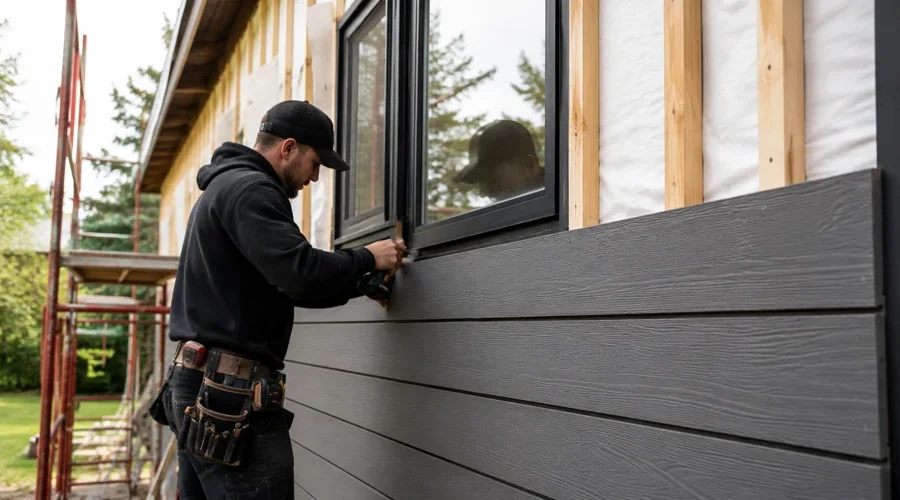
- Panel mounting — panels are aligned, fastened, and secured according to manufacturer specifications.
- Sealing and trim work — joints, window surrounds, and roof transitions are sealed and finished.
- Final inspection — the completed installation is checked for airtight seals, proper alignment, and code compliance.
Skipping or rushing any of these steps is where most long-term problems begin, particularly the moisture barrier stage.
Common Installation Mistakes That Cause Premature Failure
Even experienced property owners are often surprised by how often these issues show up on under-supervised projects:
- Installing cladding directly over an existing moisture problem instead of addressing it first
- Skipping the rainscreen air gap, which traps condensation behind the panels
- Using the wrong fasteners for the substrate or panel material
- Failing to account for thermal expansion, especially with metal panels in Ontario’s temperature swings
- Sealing joints with inferior caulking that breaks down within a few years
Any one of these can shorten a cladding system’s life by a decade or more, regardless of how good the material itself is.
What Separates a Qualified Installer From the Rest
Not every contractor who sells cladding also installs it well — and not every installer has experience with every material type. Before signing a contract, look for:
- An in-house installation team rather than rotating subcontractors
- Manufacturer-specific training or certification for the panel system you’ve chosen
- Documented experience with your building type (residential, commercial, or industrial)
- A written installation plan that includes moisture barrier and sealing details
- A workmanship warranty separate from the material manufacturer’s warranty
Contractors who can speak confidently and specifically about each of these points are far less likely to cut corners on-site.
Where Installation Fits Into a Larger Renovation
Cladding installation rarely happens in isolation. If you’re already planning a broader exterior or whole-home renovation, it’s worth sequencing the cladding work alongside insulation upgrades, window replacement, or structural repairs, since reopening a finished wall later to fix an unrelated issue adds unnecessary cost.
Coordinating these trades together also reduces the risk of one contractor’s work undoing another’s — a common issue when insulation and cladding are handled by separate, uncoordinated crews.
Getting Started
For builds requiring code-compliant detailing, Canada’s National Building Code sets the baseline standards that any qualified installer should already know inside and out; you can review the current requirements directly through the National Research Council of Canada. For background on how cladding systems are classified and engineered more generally, Wikipedia’s overview of cladding is a useful starting point.
If you’re comparing installers, BuildSky’s professional cladding installation services are worth a look for projects across Toronto and the GTA, particularly given their use of in-house installation teams rather than subcontracted crews. And if you’d rather compare multiple vetted contractors before deciding, browsing general contractors listed on TopPros is a fast way to get several quotes side by side.
Getting the material right matters. Getting the installation right is what determines whether that material actually delivers on its promise.